If you’ve got a stash of paper straws sitting in a drawer right now, today is your lucky day.
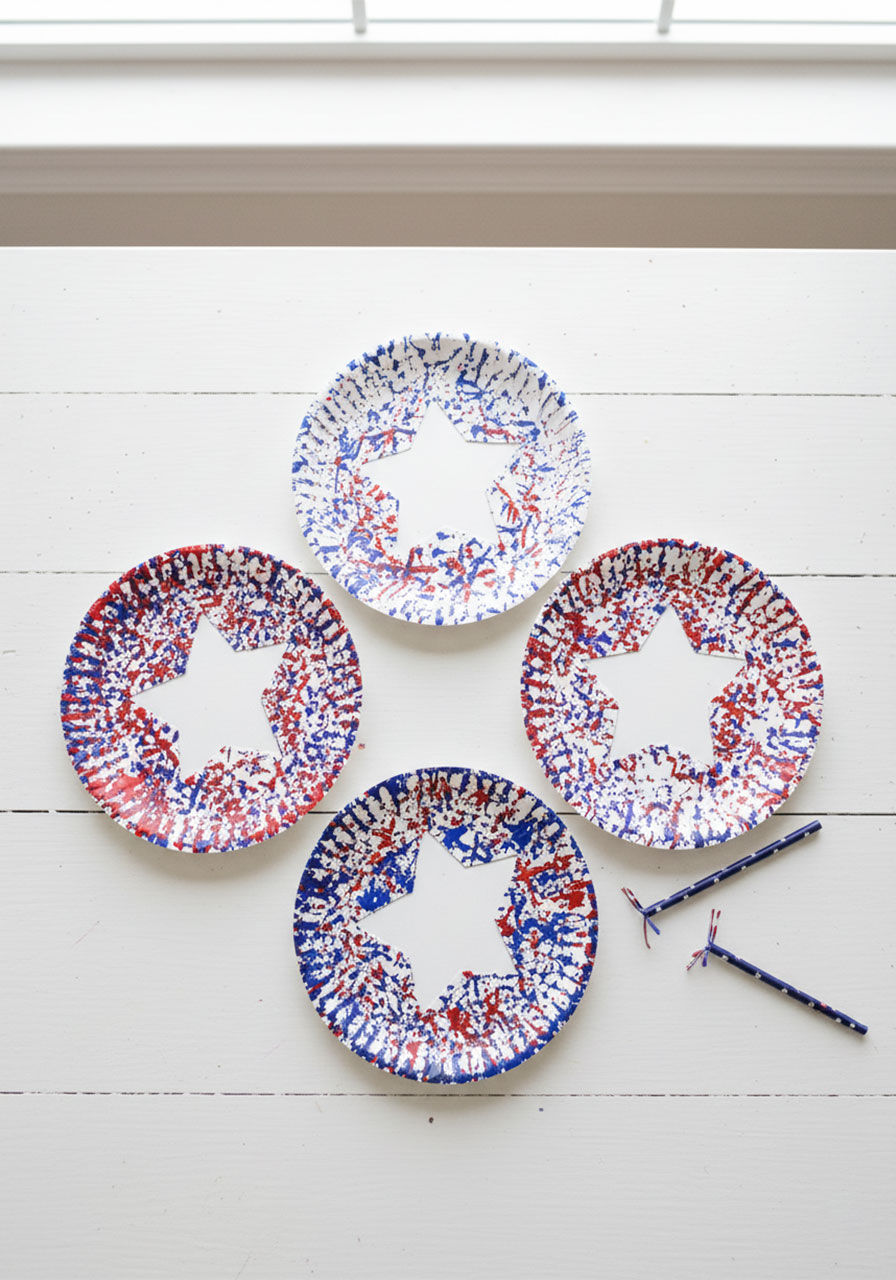
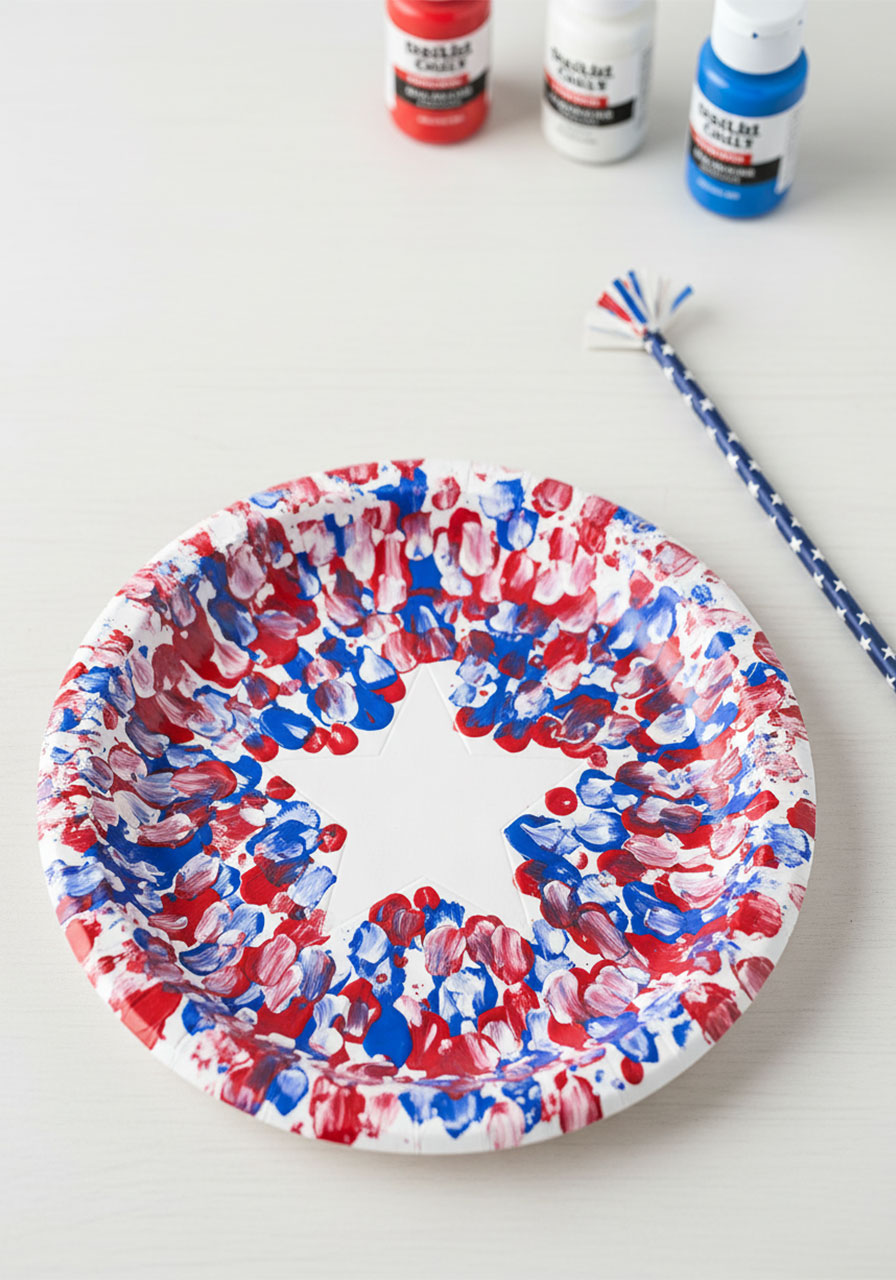
This Straw Stamped Paper Plate 4th of July Craft is one of those rare ideas that looks absolutely stunning – and is genuinely fun to make. We’re talking red, white, and blue splatter magic that almost looks like patriotic tie-dye on a plate.
It’s festive. It’s easy. And honestly? It’s just really, really satisfying to stamp.
Whether you’re looking for a rainy-day activity before the big holiday, a fun project to do with your kids, or a quick and cheerful decoration to hang around the house – this one checks every single box.
Let’s get into it!
Why You’ll Love This Craft
There’s something almost meditative about the stamping process here. You dip, press, lift – and with each stamp, your plate comes more and more alive with color.
The fringe you make at the tip of the straw creates the most beautiful burst pattern. It mimics the look of a firework exploding in the night sky, which is just too perfect for the 4th of July.
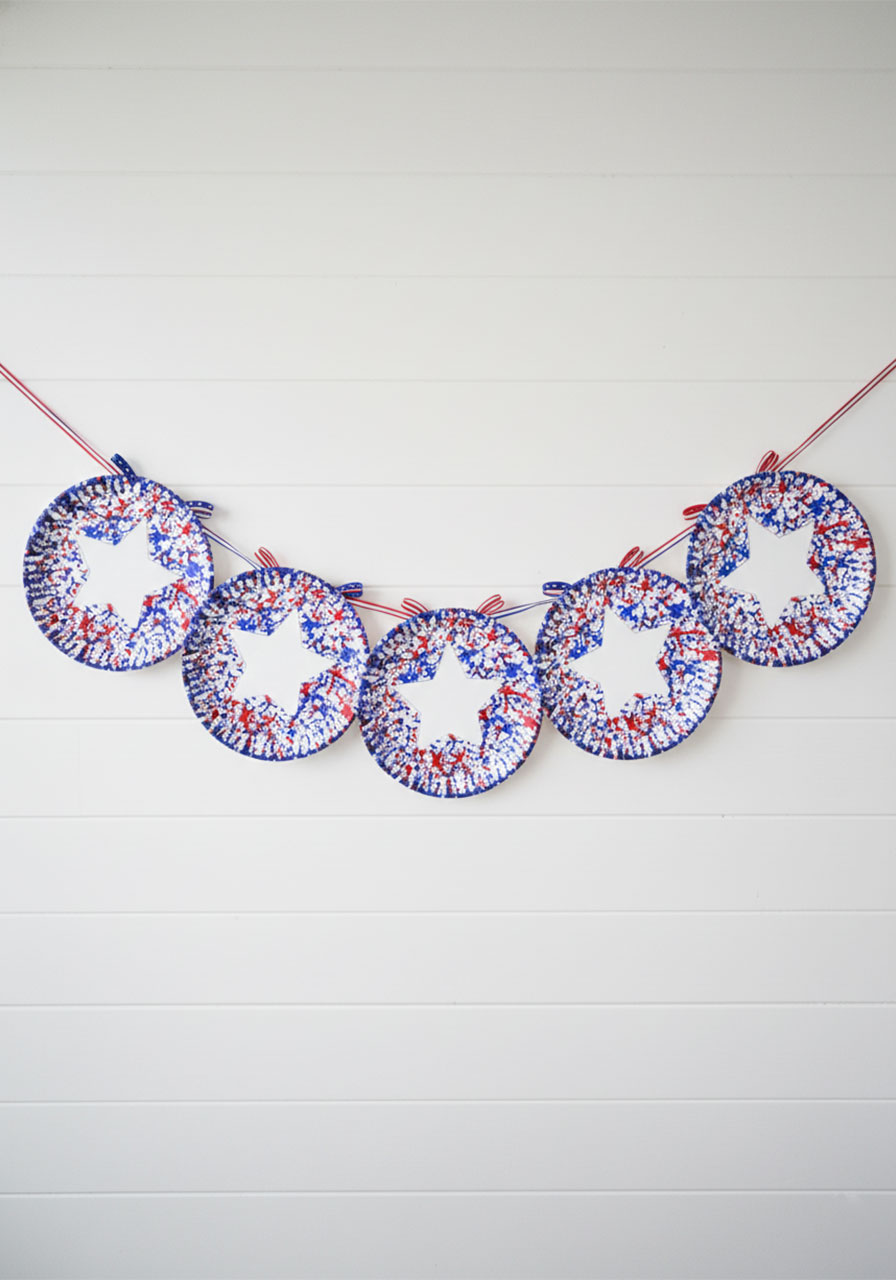
And when you link a few finished plates together? You’ve got yourself an adorable patriotic garland that costs next to nothing and looks like you planned it weeks in advance. (Your secret is safe with us.)
This craft also doubles as a beautiful reminder that creativity doesn’t have to be complicated. A paper plate, some paint, and a humble straw – that’s all it takes to make something you’ll genuinely want to display in your home.
What You’ll Need
White paper plates (as many as you want to make!)
Acrylic paint in red, white, and blue
Paper straws (patriotic star-print ones are extra cute, but any straws work)
Scissors
A marker (a light-colored one like teal or light blue works great)
A spare paper plate or palette to hold your paint
That’s it. No fancy tools, no special skills required – just grab what you’ve got and let’s make something gorgeous.

How to Make Your Straw Stamped Paper Plate 4th of July Craft
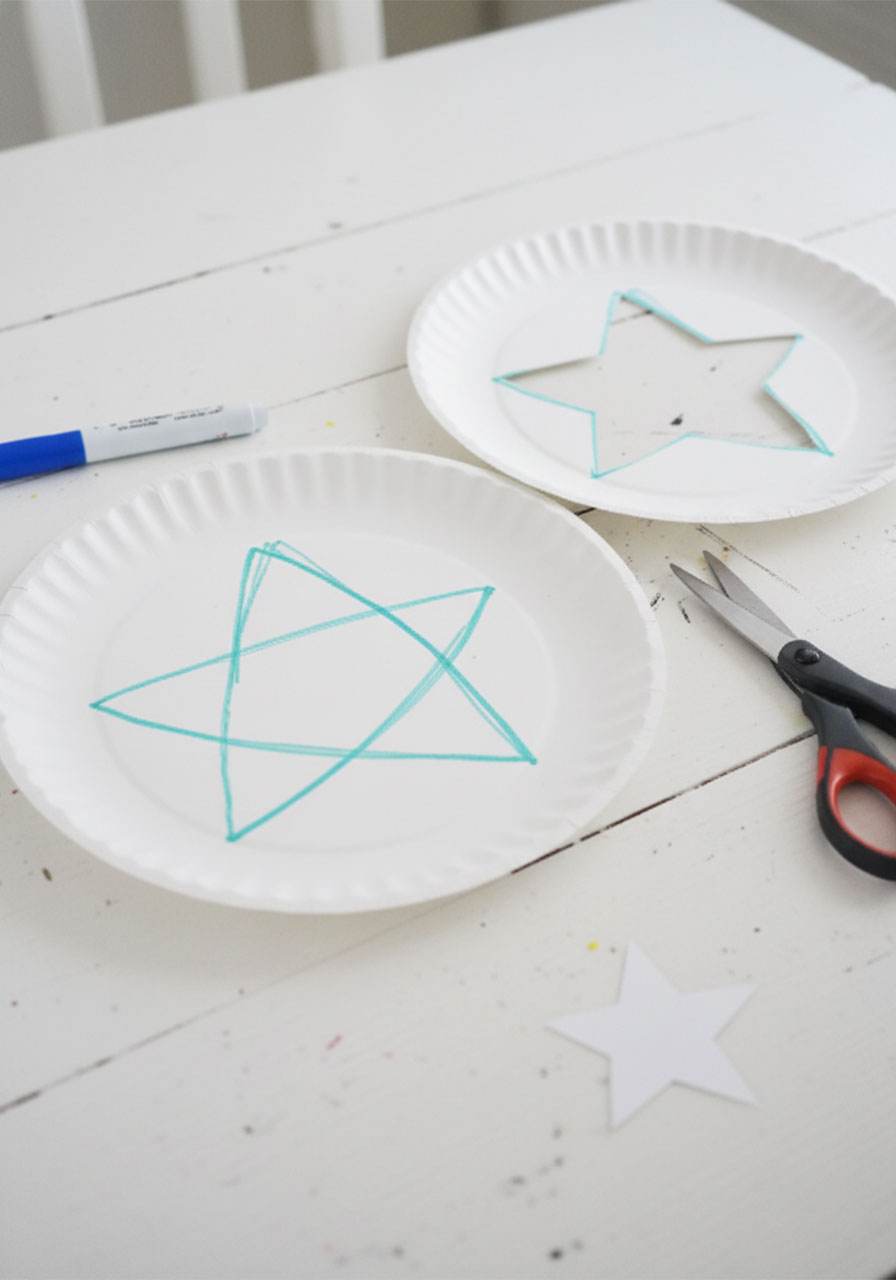
Step 1: Draw Your Star
Flip your paper plate over so you’re working on the back side.
Use your marker to draw a large star in the center of the plate. Don’t stress about making it perfect – a slightly imperfect star has so much charm.
Make it big enough that it will really stand out once you start stamping around it. The star is going to become your negative space, so the bigger, the better.
Step 2: Cut Out the Star
Here’s where an adult or older teen steps in. Carefully poke the scissors into the center of the star and cut it out along the lines you drew.
Once it’s cut, flip the plate back over to the front. You now have a beautiful star-shaped window right in the middle of your plate. This is the part that stays white – your clean, crisp star silhouette.
Set your cut-out star aside. (You can stamp it too and use it as a bonus decoration later!)
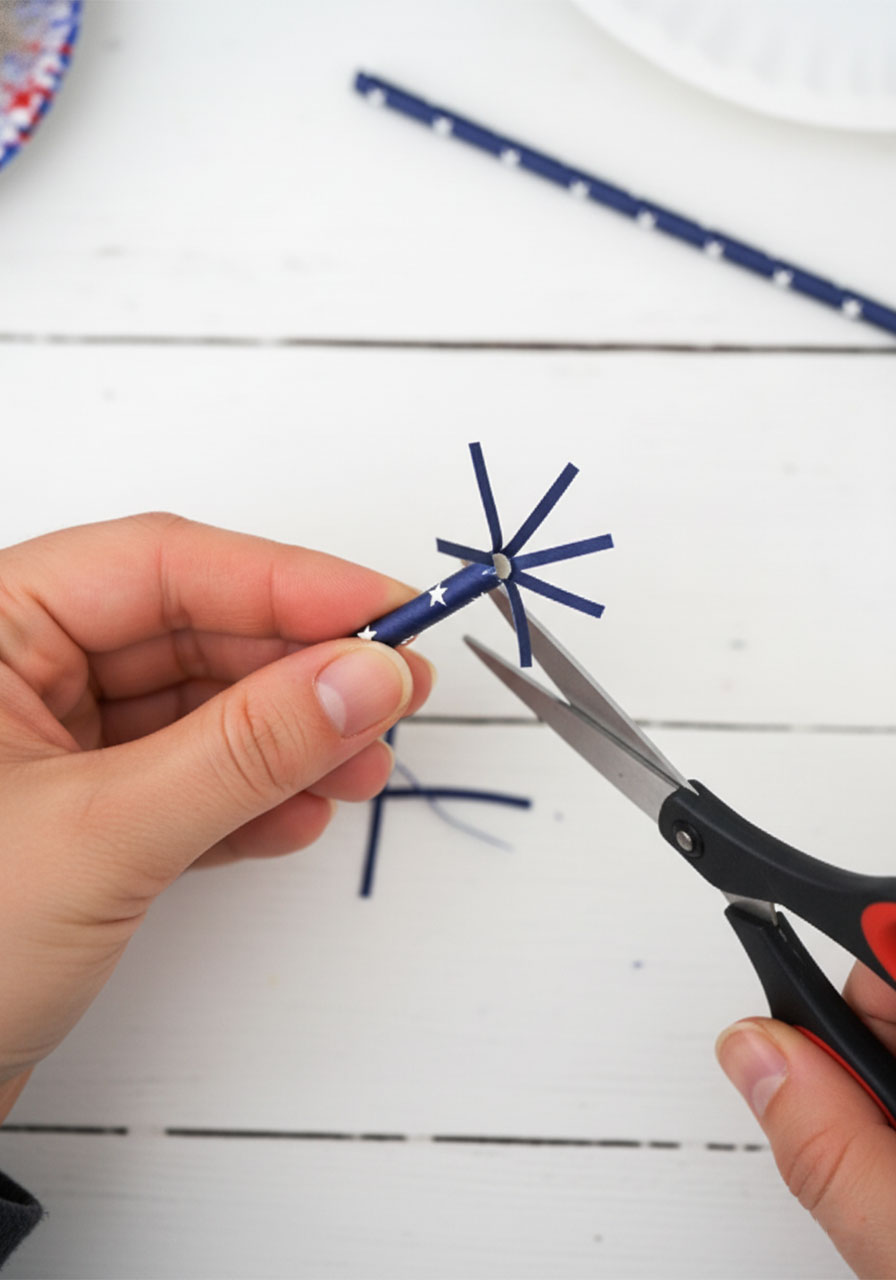
Step 3: Prep Your Stamping Straw
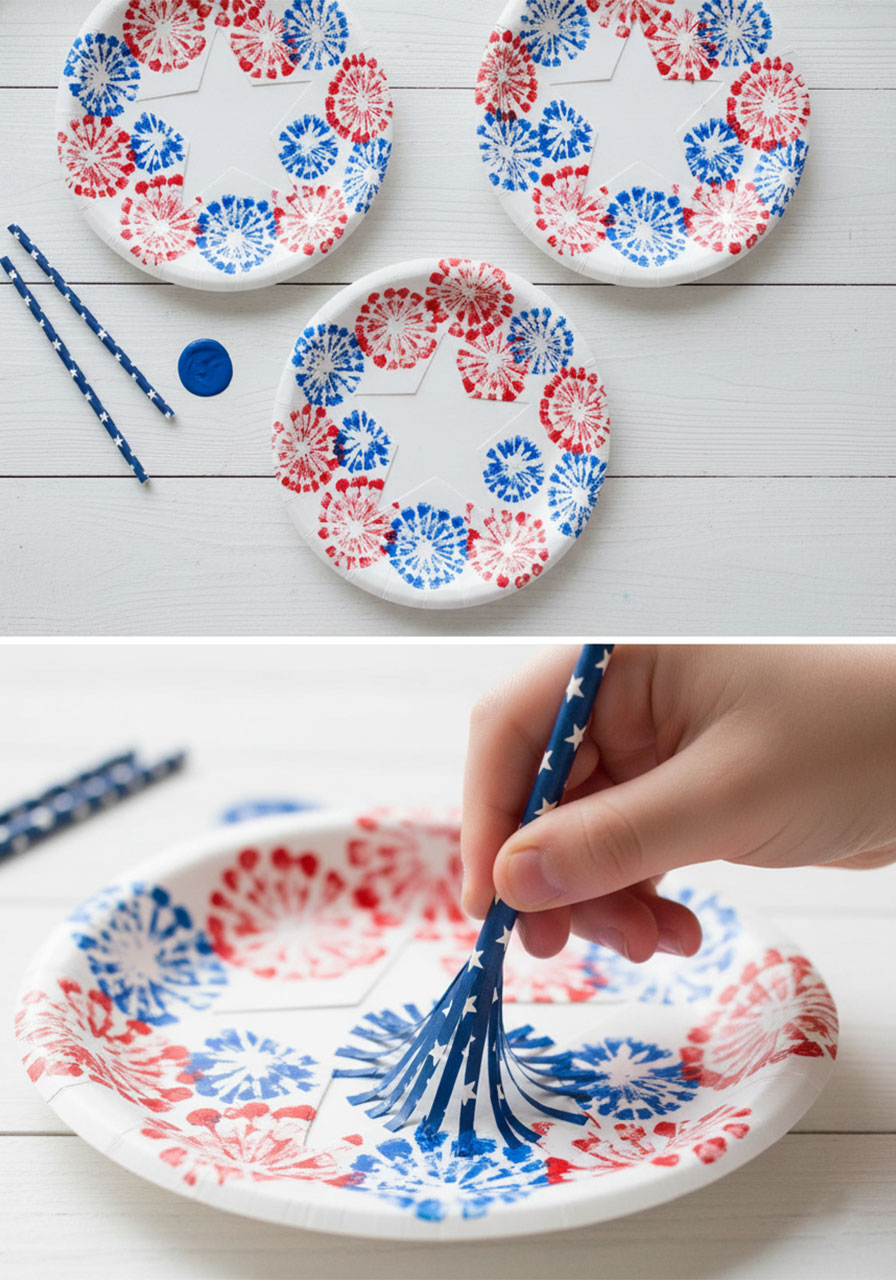
This is the fun part. Take your paper straw and use scissors to make small snips at one end – about an inch up the straw.
Try to make as many snips as possible. The more strips you create, the more paint coverage you’ll get with each stamp. Just be careful not to cut the strips all the way off.
Once you’ve made your snips, gently bend all the little strips outward so they fan out like a burst – like a tiny firework at the end of your straw.
Now you have your very own custom stamp. How cool is that?
Step 4: Load Up the Paint
Squirt your red, white, and blue paint onto a spare paper plate. Keep the colors separate so you can switch between them easily.
Dip the fanned-out end of your straw into one color, making sure every little strip is coated with paint.
Give it a quick moment so it doesn’t drip, then you’re ready to stamp!

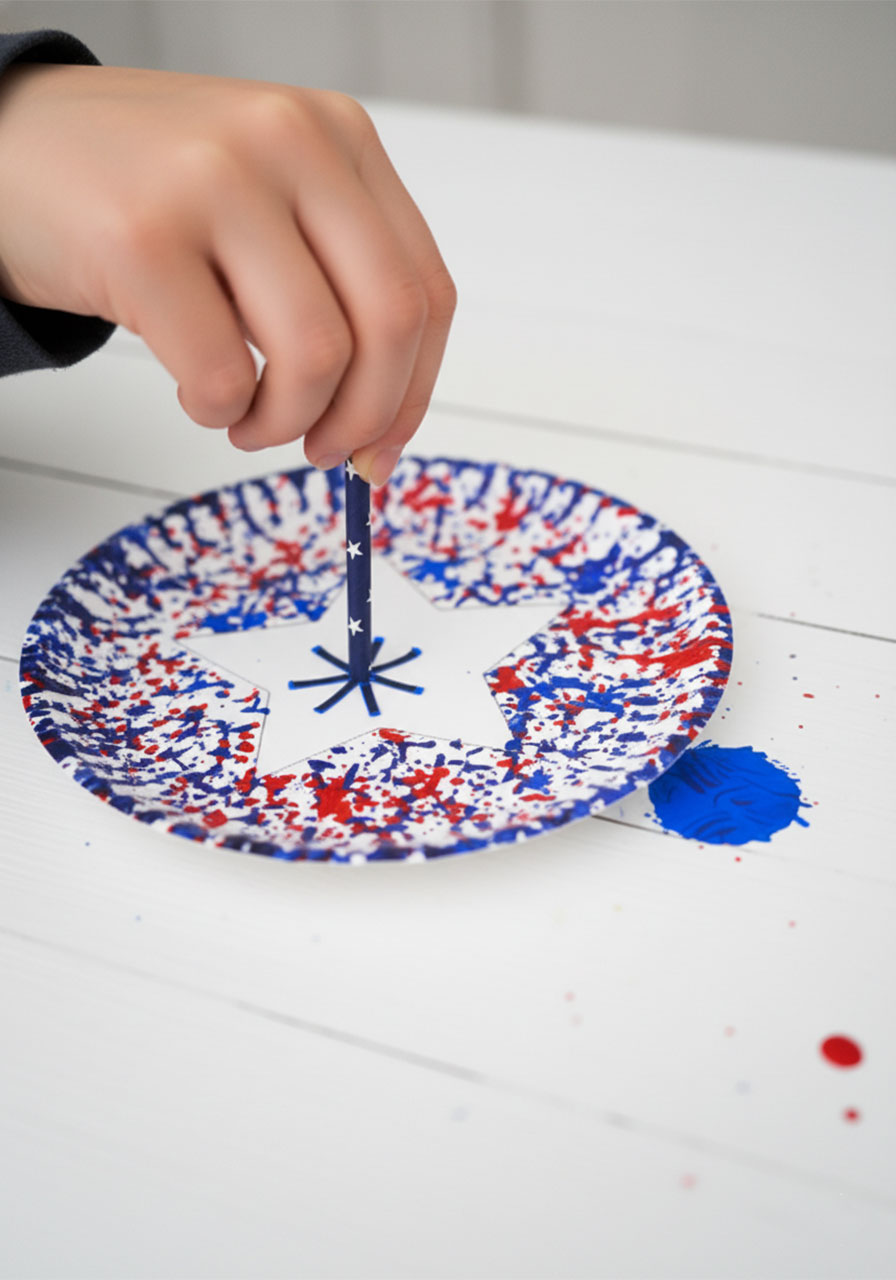
Step 5: Start Stamping!
Press your loaded straw firmly onto the paper plate and lift straight up. That burst pattern is going to make your heart happy – it looks like a tiny firework explosion every single time.
Start stamping all around the plate, working around the star cutout in the center. You want to fill up the whole plate with color, so don’t be shy.
Switch colors as you go. There’s no exact science here – just keep layering red, white, and blue stamps until the plate is covered in patriotic glory.
Pro Tip: We love saving the white paint for last. White stamps layered over red and blue add that beautiful, bright sparkle that really makes the whole thing pop.
Step 6: Let It Dry
This is the hardest step – waiting!
Set your finished plate aside and let it dry completely before you handle it. Acrylic paint dries pretty quickly, but give it at least 20-30 minutes to be safe.
While you’re waiting, go ahead and make a few more plates. Trust us, once you start, you won’t want to stop at just one.
Step 7: Display Your Masterpiece
Once dry, your Straw Stamped Paper Plate is ready to show off!
Hang a single plate on the wall or door for a simple patriotic accent. Or link several plates together side by side for a stunning 4th of July garland. The overlapping circles create a really beautiful chain effect that looks like it belongs at a professional party setup.
Either way, you’ve made something genuinely lovely – and you did it with a paper plate and a straw. That’s what we call a win.
Tips to Make It Even Better
Make multiple straws. Having two or three prepped stamps ready to go means you can switch colors faster without waiting to clean your straw each time.
Try different color combos. While red, white, and blue are classic, you could try navy and gold for a more elegant look, or go all-white stamps on a blue-painted plate for something really striking.
Turn it into a garland. Punch a small hole at the edge of each finished plate and thread them onto twine or ribbon. Hang across your mantel, porch railing, or dining table for instant festive flair.
Let kids take the lead on stamping. This process is incredibly forgiving – the “messier,” the more it looks like beautiful splatter art. Kids tend to produce the most gorgeous results!
Use star-print straws for an extra patriotic touch. The star pattern on the straw itself adds a sweet little detail that makes it even more on-theme.
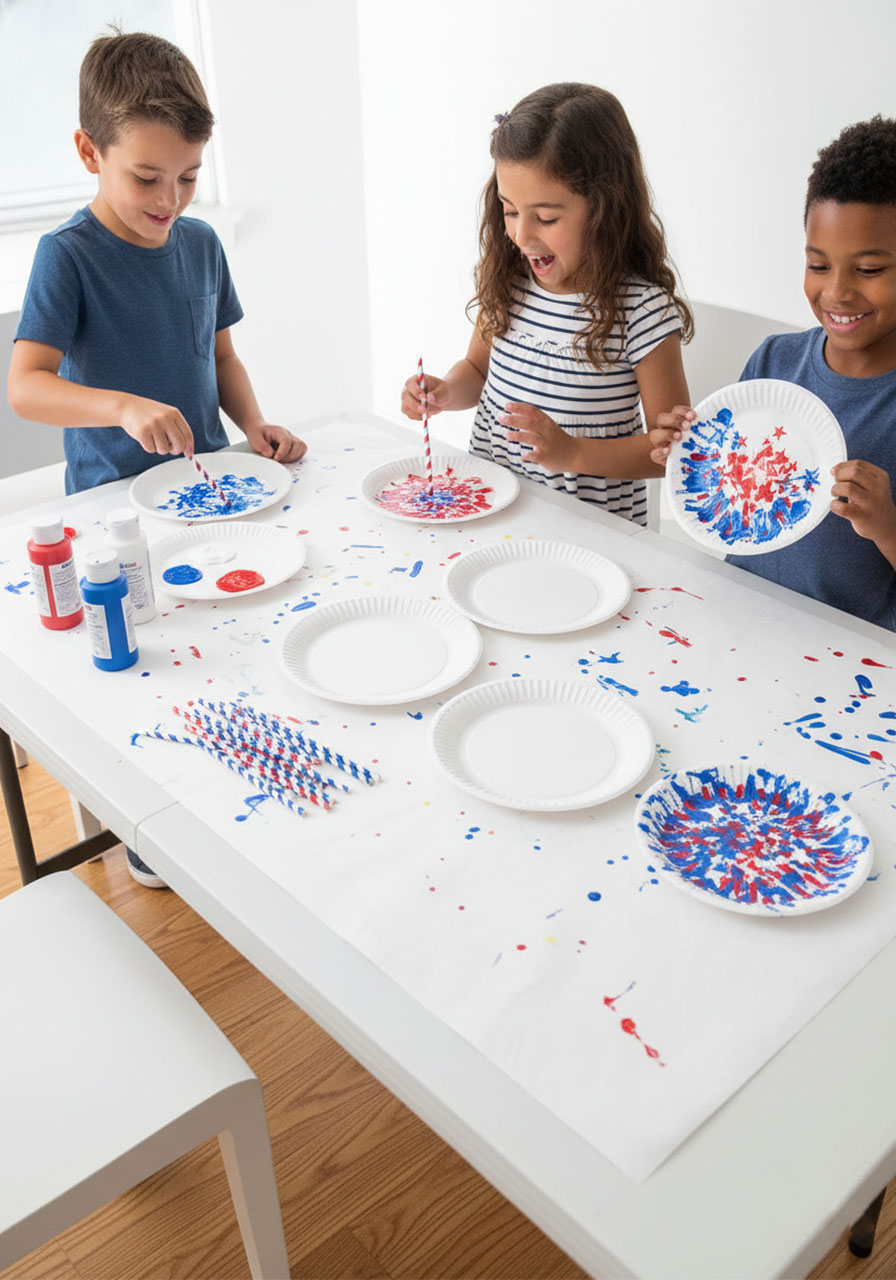
Make It a Party Activity
Here’s a thought – why not set this up as a craft station at your 4th of July party?
Lay out a few paper plates, squeeze out the paint colors, prep a handful of straw stamps, and let guests make their own. Adults and kids alike will love it. There’s something irresistibly fun about dipping and stamping – it brings out the creative spirit in everyone.
Each plate will look completely unique, which makes it an even more special keepsake. Imagine your guests going home with a handmade patriotic decoration they made themselves. That’s the kind of party memory that sticks.
You could even make it a gentle competition – who can create the most colorful plate? Who can fill theirs in the fastest? Pair it with some lemonade and a patriotic playlist, and you’ve got yourself a perfect holiday afternoon.
Why This Craft Is Worth Your Time
In a world of complicated Pinterest projects that look nothing like the photo by the time you’re done, this one actually delivers.
The straw stamping technique is almost foolproof. The result is always beautiful – because the randomness of the splatter is kind of the whole point. Every stamp is a little different, which means every plate is genuinely one-of-a-kind.
It’s also a reminder that the best moments with the people we love don’t require perfection. They require presence. Sitting down with a plate, some paint, and someone you care about – that’s a beautiful thing.
So this 4th of July, before the fireworks, before the cookout, before all the festivities – take an hour and make something with your hands. You’ll be glad you did.
Quick Recap: Straw Stamped Paper Plate July 4th Craft
Best for: Kids, families, party crafts, home décor
Time to Make: 30–45 minutes (including dry time)
Difficulty: Super easy – beginner-friendly!
Supplies Needed:
- White paper plates
- Acrylic paint (red, white, blue)
- Paper straws
- Scissors
- Marker
Steps at a Glance:
- Draw a star on the back of your plate
- Cut the star out
- Snip the end of your straw and fan out the strips
- Dip the straw end into paint
- Stamp across the plate, layering colors
- Let dry completely
- Hang and enjoy!
We hope this craft brings a little extra sparkle to your holiday celebration. If you make one (or five!), we’d absolutely love to see it. Happy 4th of July – now go make something beautiful! 🎆
More 4th of July Ideas to Keep the Fun Rolling:
Post navigation

PlayPartyGame
Email:
Leave a Reply
Your email address will not be published. Required fields are marked *
Comment *
Name *
Email *
Website
